Sometimes you walk around a furniture store looking for a nice table to furnish your home with, and you are puzzled by the sheer amount of these tables. Most of them end up having a short shelf life, and you are then forced to dig into your pockets once more to replace the table.
Other times we spend a lot of time looking for a table that fits our taste, and we are forced to settle on that which we can afford because the table we like usually costs a lot.
Well, the good news is, you can build the table you want from the comfort of your own home in as little as just a few weeks. This guide will show you how to build a table.
If you want to see more woodworking wizardry — check out our FREE 50 woodworking plans eBook

Tools
First of all, you need to have tools if you want to build even a basic table.
Here are some of the tools required:
1. A saw for cutting out the necessary measurements from the planks of wood required for the table
2. Sander/sandpaper which is necessary for smoothening out the table surfaces and edges.
3. A screw diver for driving screws into the wood
4. A chisel for chipping out the notches
5. Pocket hole jig to drill holes into the table joints
6. A drill to drill holes into the wood.
7. Tape measure (we recommend Stanley’s Powerlock) to measure the dimensions of the table
How to build a table – Steps
1. Plan
The first step to making a table is, having a design. There are different types of tables. You have to take your time and look for a model you want. Google various table designs until you settle a design you like. If you are still not satisfied, consider Ted’s Woodworking collection of plans.
Once you have decided on a plan you like, the next step is making a rough sketch of the design on a piece of paper to have a rough idea of how the table will look. The drawing also helps you understand the design of the table. The dimension of the table is not that important when sketching your design.
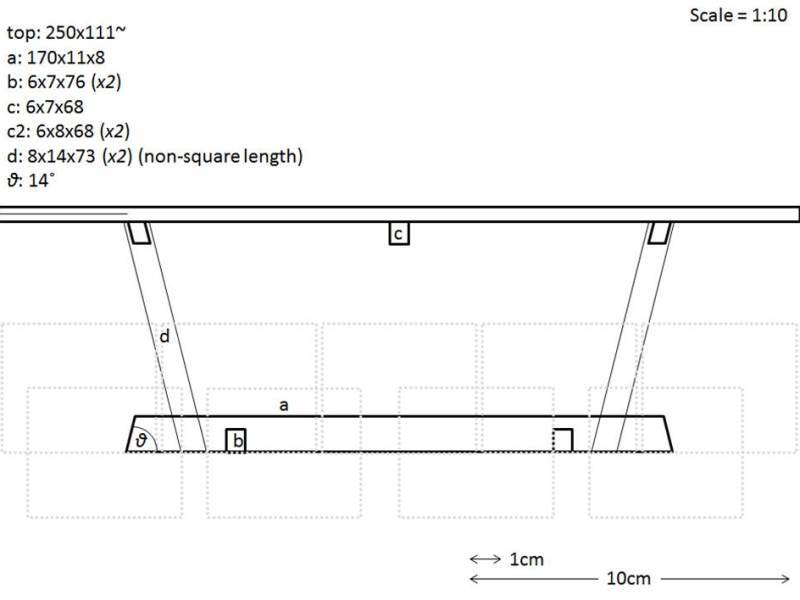
After having your design, the next step is looking for lumber. When searching for lumber, note that the lumber sizes are a centimeter and a half smaller so add half a centimeter to the dimensions noted down in the store. You can choose to go with either hardwood like maple which is usually expensive or settle for soft wood like pine which is cheaper but also sturdy and can last for decades. After all, finding the best wood for tables is up to you.
What also helps is to break down your table into simple components like the table top, apron and legs to have an idea of how much you will need to avoid going to the store now and then. You can even save yourself the struggle of cutting the lumber by asking the store to cut it for you, giving you an easy time when building the table.
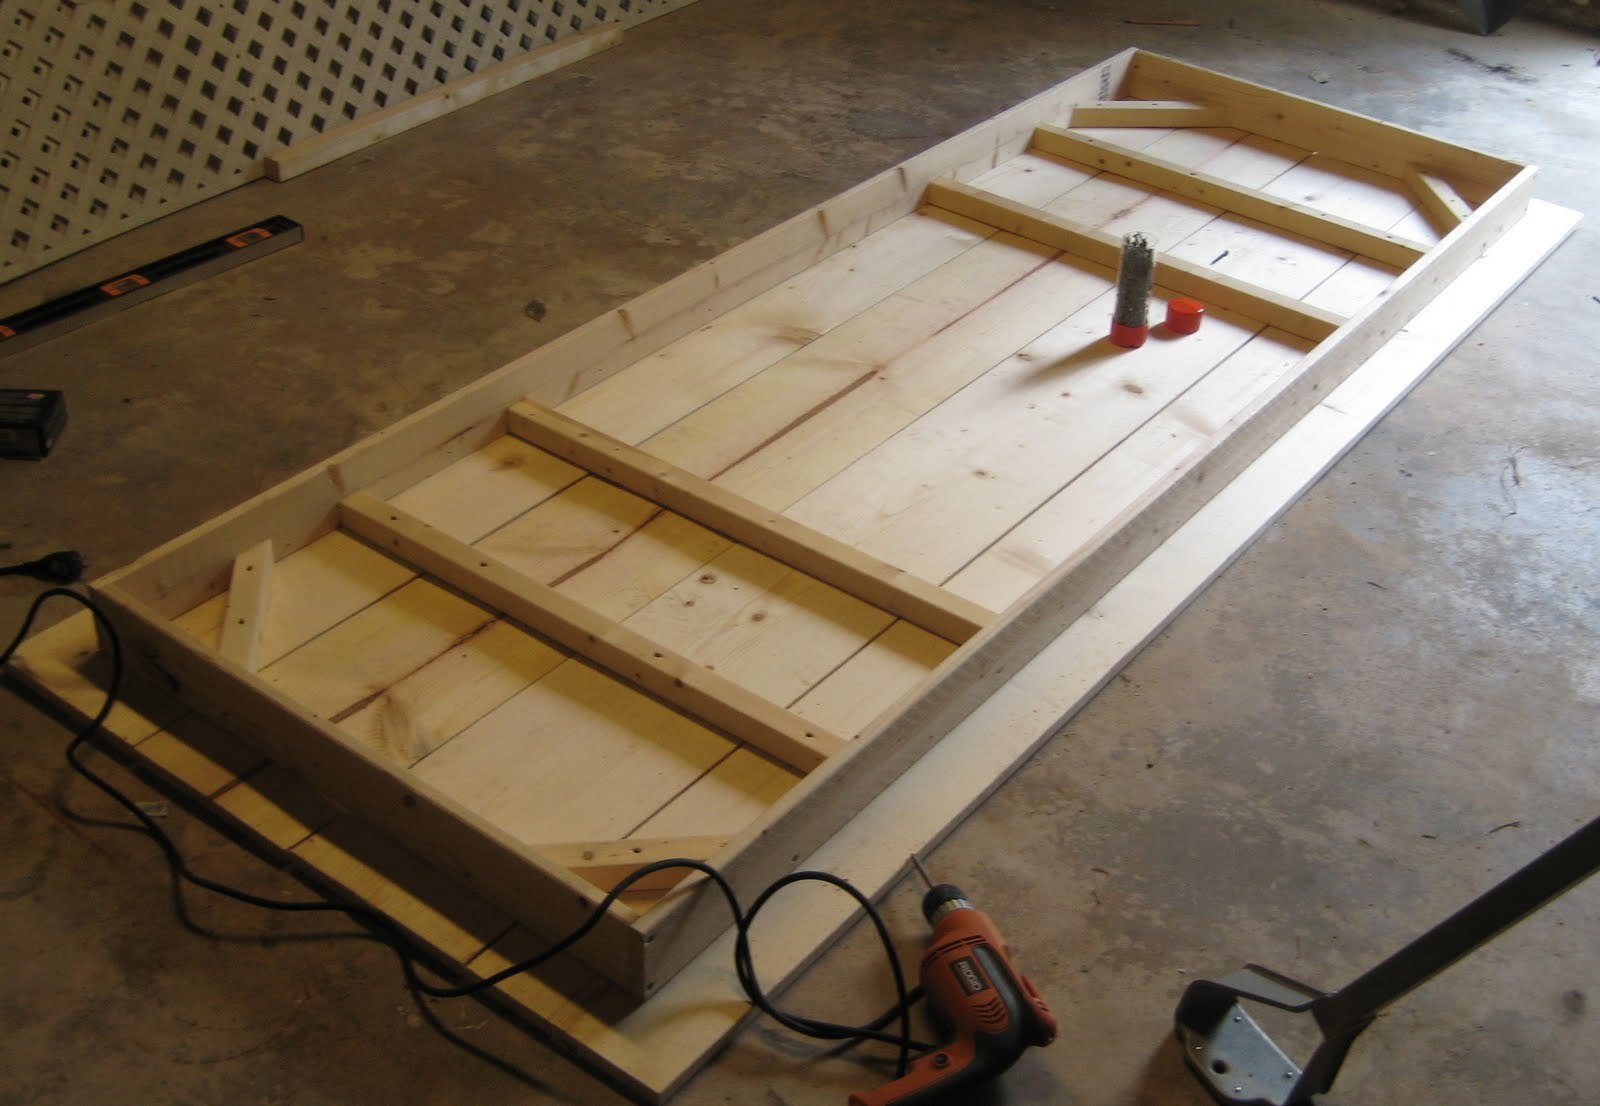
2. Build the Table Top
Once you have the lumber cut at the store or after cutting it yourself based on the dimensions you want the next step is building the tabletop. Making the tabletop has to be done on a flat surface to give the table a flat top. Look for a flat surface and lay the cut pieces of lumber.
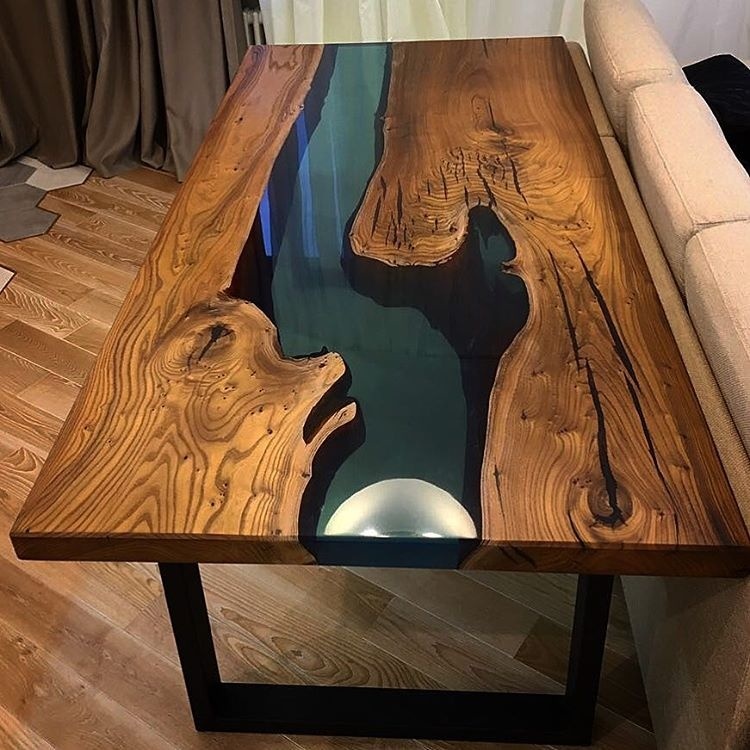
And speaking of tabletops, you can always kick it up a notch with the DIY Epoxy Resin Table! Here’s an example of what we’ve got:
You can arrange them according to how you want the tabletop to look. Clamp the pieces of lumber together and drill pocket holes using the pocket hole jig. Drive screws into the drilled holes to secure the lumber pieces together. Drilling holes first before driving the screws prevent your wood from cracking.
Use your now complete table top’s underside to trace the position of the aprons. Aprons attach to the tabletop and the legs. Use a pencil to outline the positions of the apron underneath the tabletop then use wood glue to connect the aprons to the outlined position.
If you want to see more woodworking wizardry — check out our FREE 50 woodworking plans eBook
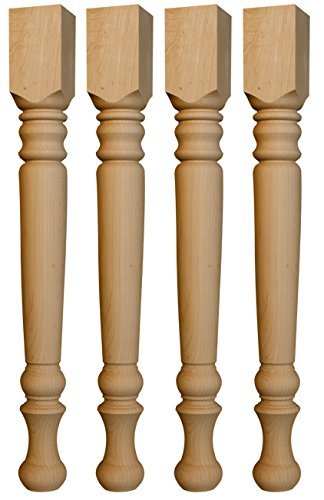
3. Table Legs
In this step, you need to be careful because a poorly trimmed/carved leg will lead to a wobbly table. And we, of course, need to get a sturdy table. So, when cutting the legs of the table, line the legs next to each other. This will enable you to measure the legs against each other and make the necessary cuts for them to have the same measurements.
Once you have equal leg sizes, check where the aprons connect with each other as this will form the corner joints where the legs will be positioned. Position the legs and glue them using wood glue to fix the apron joints.
Secure the legs to the apron joints by drilling two holes through the apron into the table leg, on a hole on each side the leg is attached to the apron. Each leg will have two drill holes. Drive in screws through the holes to secure the leg to the apron.
You can also use crossbeams to connect the legs to each other to give a more stable table. Measure the length between the legs and cut a plank of wood according to the measurements. Fit in the cross beams and drill in screws to secure them to the legs.
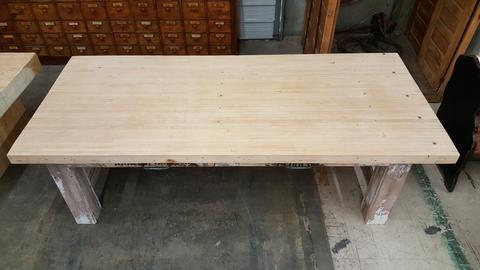
NOTE: Thoroughly read the wood glue manufacturer’s instructions on how long to wait until the glue is dry. Do not flip the table over until the glue is dry. After making sure the wood glue is completely dry, flip the table over and make sure it is stable and not wobbly. You can unscrew the screws to reposition the legs is the table is wobbly.
4. Smoothening and Staining
This is where you give your table that smooth feel. However, sanding and staining your table is not essential if you like your table’s finish. But if you want to smoothen it, you can use sandpaper to smoothen the rough patches or a belt sander which will even simplify your work.
When using the belt sander, make sure to pass it over the surfaces once to avoid leaving any lasting marks on the table. Wash the dust from sanding off the table with a wet cloth and wait for the table to dry before staining it. You can then go ahead to stain the table using a coat of your choice.
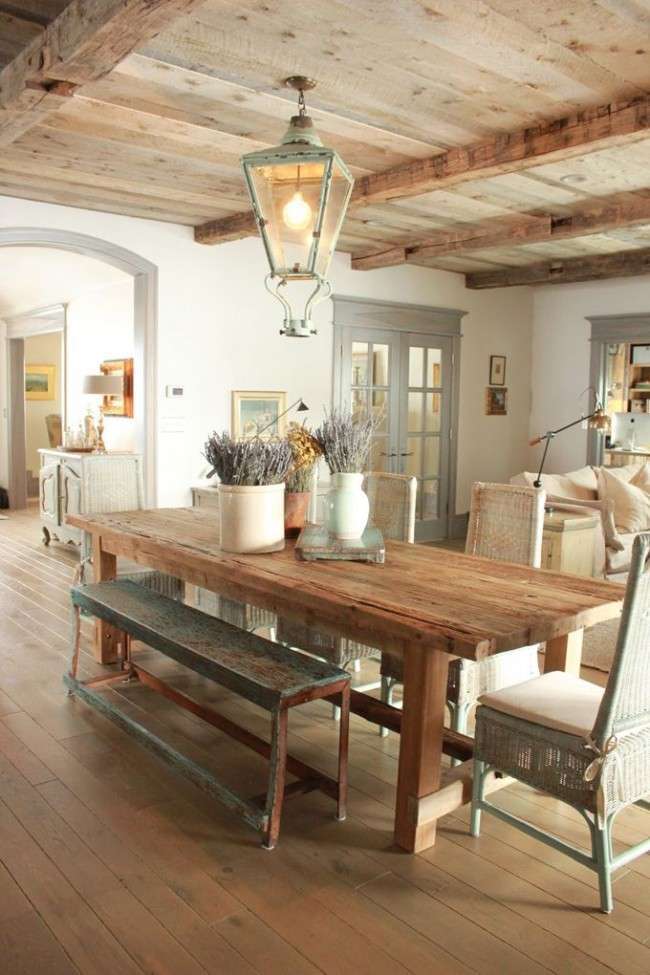
In our opinion, if you like the upper-mentioned design, you might also fancy something else along the lines of a DIY Farmhouse Dining Table (example below) or a rustic DIY Picture Frame. Also, a DIY Coffee Table made of un-aligned planks could add a nice touch-up!
You can even decide to mix different coats to get a unique color to stain your DIY table. Do not forget to apply a protective finish once the coat is dry. Polyurethane offers a nice protective finish on the coat.

And that is how you make a table!
If you want to see more woodworking wizardry — check out our FREE 50 woodworking plans eBook 🙂